
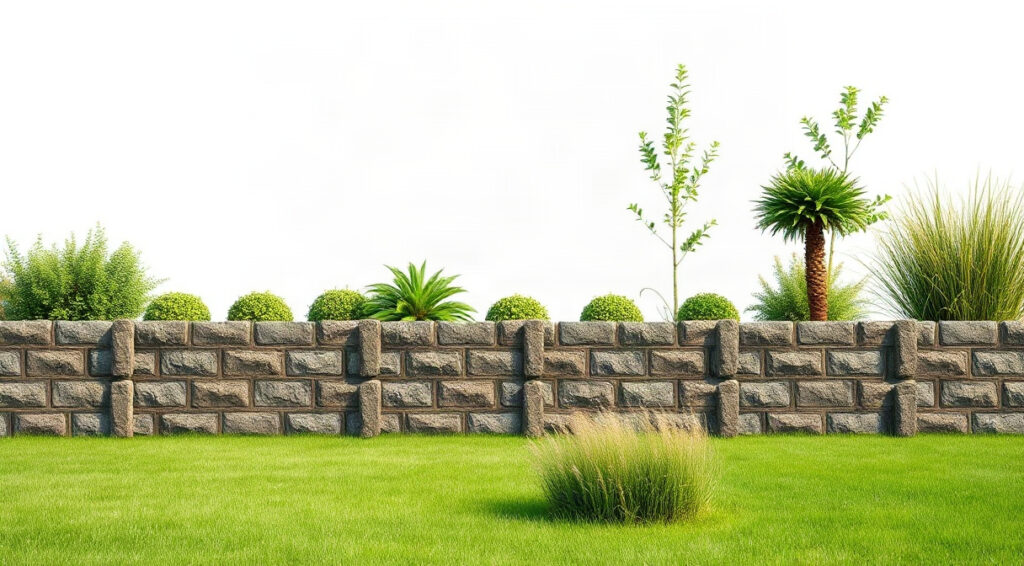
How to level a garden depends on what is causing the uneven ground: shallow bumps can often be corrected with soil and a rake, while a steep backyard needs careful grading, drainage, and sometimes a retaining structure. A successful project starts with a measured plan, not a rush to move soil. The goal is a stable, gently graded space that sheds water safely and suits the way you want to use it.
This step-by-step guide explains how to assess the slope, remove excess soil, build suitable sub-base layers, manage runoff, and choose a retaining wall. It also covers finishing and lawn recovery, so the level area remains useful after the work is done.
How to level a garden: assess the slope and plan
Before digging, decide what “level” should mean for your yard. A perfectly horizontal surface is not always desirable: a slight, consistent fall helps water move away from buildings and toward a safe drainage area. For a lawn or patio, plan a gentle grade—often around 1–2% away from the house—while checking local guidance and site conditions. That is a fall of roughly 1–2 cm per metre. Do not redirect runoff onto a neighbour’s property or toward a foundation.
Start by walking the space after rain. Mark puddles, soft patches, exposed roots, steep breaks, and places where water runs quickly. Note the intended use, too. A play lawn, shed base, path, and seating area have different requirements for firmness and drainage. If you are turning a slope into separate usable levels, these ideas for building garden terraces on a slope can help you compare layouts before choosing a wall or grade.
Measure before moving earth
Use wooden stakes, string, and a line level for a small area, or rent a laser level for a larger yard. Drive stakes around the proposed work zone and mark a common reference height. Measure from the string to the ground at regular points, such as every metre. Record the high and low spots on a simple sketch. This shows how much soil must be cut or added and helps reveal whether a single flat plane is realistic.
Check for underground utilities before excavation, and identify irrigation lines, drains, tree roots, and buried cables. Contact the relevant utility-location service where available. Keep machinery away from mature tree root zones; cutting structural roots to gain a flat lawn can destabilise a tree. For major changes near a house, boundary, or shared drain, seek advice from a qualified landscape professional.
- Mark the finished edges and any paths, beds, or steps.
- Set a clear runoff direction and a safe outlet before grading.
- Photograph the site and note existing drain covers and service routes.
- Check local rules for retaining structures and changes to boundary levels.
Choose a suitable work window. In many temperate regions, April or September offers workable soil and time for grass to recover, but avoid digging when the ground is saturated, frozen, or baked hard. Wet clay compacts into dense lumps and smears under tools; very dry soil is difficult to shape evenly. A frequent planning mistake is setting the new surface at the height of the highest point without considering doors, vents, paving, or the finished soil depth. That can trap moisture against a building or bury features that need to remain visible.
Remove excess soil and establish the finished grade
Once the layout and heights are set, clear the work area of furniture, loose stones, weeds, and debris. If you are reshaping an established lawn, cut and lift reusable turf in manageable strips. Keep it shaded and slightly moist if it will be relaid soon. Remove the topsoil separately from subsoil: the dark, biologically active top layer is valuable for the final growing surface, while the denser material below is better suited to shaping and structural fill when it is appropriate for the site.
Cut high spots gradually rather than scraping deeply in one pass. A flat shovel, spade, or turf cutter works for smaller areas; larger jobs may need compact equipment operated by someone experienced. Move suitable excavated soil to low areas only after checking that it is clean and not waterlogged. Remove roots, rubble, and construction waste. If soil is contaminated, unusually salty, or full of debris, do not bury it under a lawn—get local soil advice and dispose of it appropriately.
Build the shape in controlled lifts
Spread fill in even layers, generally no thicker than about 10–15 cm before compaction for ordinary garden grading. The exact lift depth depends on soil type and equipment. Compact structural fill in thinner lifts with a plate compactor or hand tamper, then recheck the grade. Do not compact the final layer of topsoil as firmly as the base: lawn roots need a crumbly, aerated growing medium. Keep a consistent fall away from buildings, and use a long straightedge or string line to spot dips between reference points.
If the area will support a patio, shed, or other load, do not treat loose garden soil as a suitable foundation. Remove soft organic material and follow the base depth and compaction specification for the planned surface. A lawn may need a different build-up from a paved seating area. Keep enough depth for the finished topsoil and turf, rather than filling to the final level with subsoil and later discovering there is no room for roots.
- Strip and store reusable turf and topsoil separately.
- Remove unsuitable material and shape the subgrade to the planned fall.
- Add approved fill in thin lifts, compacting and checking each one.
- Spread topsoil last, then rake it to a fine, even finish.
For a new lawn, aim for a settled topsoil depth of roughly 10–15 cm, increasing it where the existing soil is poor and the design allows. Blend compatible topsoil into the upper surface rather than laying a sharp, compacted boundary over clay. A common mistake is importing a thick blanket of rich topsoil to hide hollows. It can settle unevenly, smother existing grass, and create a soft, unstable surface. Another is leaving loose fill uncompacted; rain then settles it into depressions that require repair.
Check levels after the shaped ground has had a light watering or rainfall, then correct small hollows before laying turf or seeding. Avoid walking repeatedly over damp, freshly prepared soil. Foot traffic compresses it into ruts and undoes the grading work. When deciding how to level a garden with a substantial height difference, calculate where every cubic metre of cut soil will go before excavation begins; a disposal or fill plan is safer than creating an unplanned mound elsewhere.
Build a stable sub-base and install drainage
Sub-base material is not automatically needed beneath every lawn. It is important where the design includes a patio, path, retaining-wall footing, or a persistently soft area that requires engineered support. Match the aggregate and depth to the intended load and local soil. For a typical small paved area, a compactable, well-graded crushed aggregate is commonly used, but follow the paving manufacturer’s specification rather than copying a depth from another site. Lay it in manageable lifts and compact each evenly.
Drainage should be designed before the final surface goes down. First consider whether gentle grading alone can guide water to a planted swale, suitable lawn area, or approved drain. Where water collects behind a wall or on a slow-draining site, a drainage gravel layer can help water reach a perforated pipe, but gravel without an outlet simply stores water. Use clean, washed aggregate of the specified size and protect it from fine soil with suitable geotextile where the design calls for it. Do not wrap a pipe or fill in a way that blocks its flow.
Give water a route out
For a drainage run, set the pipe to a consistent fall toward a lawful outlet. A fall near 1%—about 1 cm per metre—is a common starting point, but site conditions and local standards determine the correct design. Use a cleanout or inspection point where appropriate, and keep the outlet accessible for maintenance. Never connect garden drainage to a foul sewer unless local rules explicitly allow it. If no safe outlet exists, ask a drainage professional about infiltration options and soil suitability before digging a soakaway.
A useful approach to how to level a garden is to test drainage early. Fill a small test hole with water and observe how quickly it drains, following local safety guidance and avoiding buried services. Slow infiltration suggests that a simple gravel trench may not solve the problem. Clay soil, a high water table, compacted subsoil, and a blocked existing drain all need different responses. The University of Minnesota Extension’s landscape design guidance offers further context on shaping and planning a landscape, but local drainage rules should take priority.
Keep runoff away from foundations and avoid creating a channel that sends water straight toward a boundary. If water is likely to cross a path, use a suitable channel drain with a maintained outlet rather than relying on a shallow groove that can erode. A common mistake is placing loose gravel directly over heavy clay and assuming it will drain. Without a permeable route or outlet, water can remain trapped at the soil interface, leaving the surface soggy while the lawn above appears finished.
- Separate drainage aggregate from fine soil where the design requires filtration.
- Check pipe fall and outlet position before covering the trench.
- Keep inspection points clear and accessible after landscaping.
- Test the system with water before installing turf or paving.
When planning how to level a garden, think of the sub-base, soil, and drainage as one system. A compacted base supports the surface; a graded soil profile directs water; and the drain carries excess water away. If any layer is installed without considering the next, the finished yard may look level but fail under rain or foot traffic. Take photographs of pipes and outlets before covering them, and keep measurements for future maintenance.
Use retaining wall blocks safely on a sloped backyard
Where the slope is too steep to shape as one continuous bank, a retaining wall can create a usable terrace. A low garden wall may be suitable for a small change in level, but wall design becomes more demanding as height, soil pressure, water load, and nearby structures increase. Check local permits and building requirements before work. For tall walls, walls carrying a driveway or building load, or any wall with signs of ground movement, use a qualified engineer or experienced retaining-wall contractor.
Choose retaining wall blocks made for the intended height and conditions, and follow the manufacturer’s installation details. Dry-stack landscape blocks and mortared masonry have different construction requirements. Set out the wall line with a string and mark its ends, corners, and any returns. A gently curved wall may suit a garden, but sharp curves and unsupported ends can create weak points. Plan steps, paths, and planting pockets before excavation so the terrace connects naturally to the rest of the yard.
Prepare the footing and manage pressure
Excavate a level trench deep enough for the specified buried course and compacted base. The first course controls the alignment of the whole wall, so set it carefully with a level and check it frequently. Use the specified compactable aggregate beneath the blocks, compacting it evenly. Many block systems require part of the first course to sit below finished grade; follow the maker’s detail rather than guessing. Build in small, consistent lifts and backfill as you go, avoiding heavy compaction directly against the wall.
Water pressure is a major cause of wall failure. Place the specified free-draining stone behind the wall and install a perforated drain at the base where the design requires it. Direct the pipe to a safe outlet. A geotextile separator can prevent fine soil from migrating into the stone, but the exact arrangement depends on the block system and soil. Do not omit drainage because the wall is short: wet clay can exert far more pressure than dry soil, and freeze-thaw movement can worsen damage in cold regions.
Most segmental block systems need a setback, or batter, so the wall leans slightly into the retained soil. Some blocks build this into their shape; others require a specified step-back per course. Check the product guide and keep each course locked and aligned. Do not build a vertical stack from blocks designed for low landscape edging. Keep heavy loads, such as a shed or vehicle, away from the top unless the wall was designed to support them. The right approach to how to level a garden is to create stable terraces, not to force a tall unsupported bank into a flat plane.
Backfill in thin layers and compact carefully with equipment suitable for the wall height and material. Excessive vibration close to the blocks can push them out of line. Recheck level, alignment, and setback after every course. Finish the top with the specified cap units or other detail that sheds water, and shape the soil behind it so runoff does not pour over the wall. For additional planning inspiration, explore stone and water ideas for a courtyard garden, while adapting any design to the slope and drainage needs of your own site.
Common warning signs include leaning, bulging, widening gaps, water seeping through joints, and soil washing out from behind the blocks. Stop adding load and seek professional advice if these appear. A wall is not a substitute for drainage, and a decorative facing does not make an unstable bank safe. If a long wall would dominate the yard, several lower terraces may fit the landscape better, provided each terrace has a stable drainage plan and the upper level does not overload the wall below.
Finish the lawn, check the grade, and keep it level
Once the base, drainage, and any retaining structure are complete, prepare the surface for its final use. For a lawn, rake out stones and clods, then firm the soil lightly with a roller or by walking across boards. The surface should be stable but not hard. Use a long straightedge to identify shallow hollows, and fill them with a suitable topsoil mix in thin layers. Do not bury grass under a deep layer of soil in one application; existing turf needs light to survive, and thick cover can leave dead patches.
For small dips in a healthy lawn, top-dress gradually with a thin layer—often around 5–10 mm at a time—of screened topsoil or a compatible sandy loam. Brush it into the grass and repeat after growth if needed. Deeper hollows should be repaired by lifting turf, correcting the underlying soil, and relaying it. For a completely reshaped lawn, seed or turf after the grade is settled. Choose grass for your climate, sun, and use: for example, a Kentucky bluegrass cultivar such as ‘Midnight’ may suit some cool-season lawns, while warmer regions need different grasses.
Establish turf without undoing the work
In many cool-season climates, early autumn—often September—is a useful time to seed because soil remains warm and air is cooler. Spring can also work, depending on the region. Sow at the rate on the seed label and keep the surface evenly moist during germination without washing seed into low spots. Lay turf on firm, damp soil and stagger the joints. If using plugs, space them according to the grass type and coverage plan; around 15–20 cm apart is a practical range for some spreading warm-season grasses, but check the variety’s guidance.
Stay off newly prepared ground when it is wet. For the first few weeks, use temporary stepping boards if access is essential, and avoid heavy equipment or repeated turns with a mower. Cut new grass only when it is established and tall enough for the mower setting; sharp blades reduce stress. A named cultivar is not a universal solution: a shade-tolerant fine-fescue mix may be better under trees, while a sunny play lawn needs a more wear-tolerant blend. Match the seed to local growing conditions rather than choosing by label alone.
To keep the result sound, inspect the yard after heavy rain and again after the first season. Look for settlement over trenches, soft spots beside the wall, and water that ponds for more than a day. Correct a minor dip promptly before it becomes a muddy rut. Clear drain outlets and remove leaves from channel grates. If the final area includes paths or gravel edges, these gravel path edging ideas can help keep loose aggregate in place beside the lawn.
A frequent finishing mistake is adding too much topsoil to fix every uneven patch. Thick top-dressing can smother grass, change the drainage fall, and hide a deeper settlement problem. If the same hollow returns, inspect the subgrade or a buried drain rather than repeatedly filling the surface. Likewise, do not aerate aggressively near shallow drainage pipes or wall footings. Keep a simple record of the finished grades, pipe routes, and wall materials so later repairs do not disturb critical layers.
The safest way to how to level a garden for long-term use is to review the whole profile after the first wet season: surface slope, soil firmness, drainage performance, and wall condition. Make modest corrections, not abrupt changes that send water elsewhere. With suitable grass established and outlets kept clear, the leveled area can support play, seating, or a path without sacrificing the garden’s ability to shed rain.
For authoritative guidance, refer to the RHS Garden Design, which provides expert recommendations on best practices.
Frequently Asked Questions
Can I level a garden without building a retaining wall?
Often, yes. A gentle slope can sometimes be reshaped by cutting high areas and filling low ones, provided the finished grade remains stable and does not direct water toward buildings or neighbouring land. For a steep bank or a large difference in height, terraces or a retaining structure may be safer than a tall, unsupported soil slope. Get professional advice if the work affects a boundary, structure, or drainage route.
How much slope should a lawn have?
A lawn should not necessarily be perfectly flat. A consistent, gentle fall—often around 1–2% away from buildings—can help move surface water. The appropriate grade depends on the soil, layout, local standards, and where runoff can safely go. Check the finished surface with a level and string, and avoid creating a steep cross-slope that makes mowing or walking difficult.
Does a drainage gravel layer work in clay soil?
A drainage gravel layer can help convey water to a working outlet, but gravel alone does not make clay soil drain. If water cannot escape, it may collect in the trench or at the gravel-soil boundary. Assess infiltration and outlet options first. A landscape drainage professional can help determine whether grading, a drain, or another solution suits the site.
How deep should topsoil be for a new lawn?
A settled layer around 10–15 cm is a common starting point for a garden lawn, though poor existing soil may require more and site conditions vary. Keep topsoil separate from structural fill while grading. Use a suitable, weed-free soil and avoid laying a deep, loose layer that can settle after rain. Follow local recommendations and the needs of the chosen grass.
Are retaining wall blocks suitable for a tall wall?
Some engineered block systems are designed for substantial walls, but a taller wall needs more careful design, including footing, setback, drainage, soil pressure, and nearby loads. Do not assume that blocks intended for edging can retain a high bank. Check local permits and the manufacturer’s specifications, and use a qualified professional for tall or heavily loaded walls.
When is the best time to level a garden?
Work when the soil is moist enough to shape but not saturated or frozen. In many temperate areas, spring and early autumn are practical windows, with September often suitable for establishing cool-season grass. Local climate matters more than a fixed date. Avoid grading during heavy rain, drought-hard conditions, or periods when newly seeded turf cannot receive regular water.
Conclusion
Knowing how to level a garden means planning the finished grade, handling soil in stable layers, giving water a safe route, and using retaining walls only when the slope calls for them. Measure carefully, check local requirements, and do not skip drainage or compaction. Ready to plan a more usable outdoor space? Find more practical ideas at Blossom Gardens Hub garden guides.
