
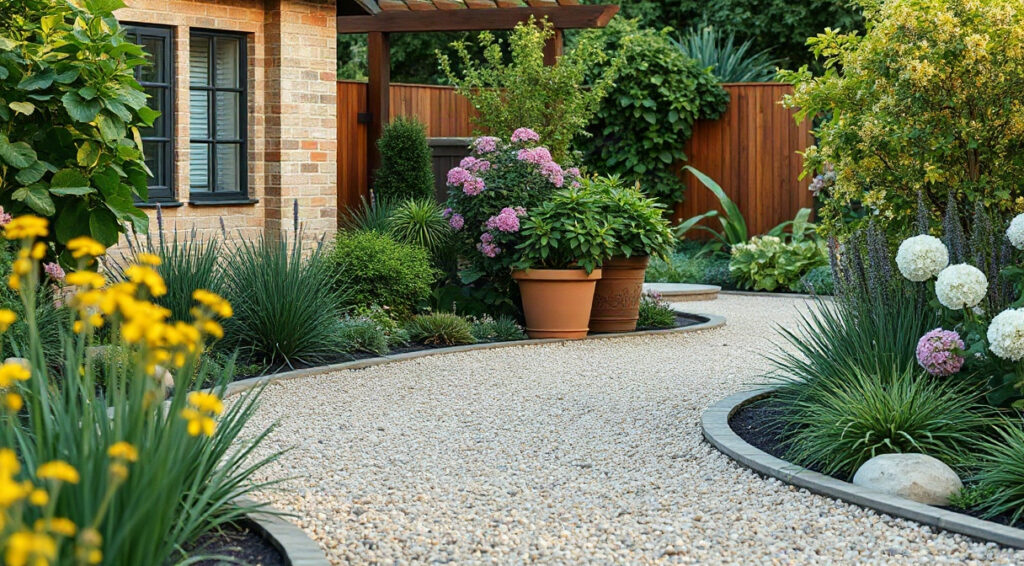
Gravel path edging ideas can turn a loose, spreading surface into a tidy route that feels intentional and is easier to maintain. The right border keeps gravel in place, defines the path against lawns and beds, and helps the whole garden look finished. Timber, brick, metal and stone can all work well, but the best choice depends on the path’s shape, the amount of traffic, your soil and the style of your home. This guide explains how to choose an edge, prepare the route and install durable borders suited to UK and US gardens.
For inspiration that connects practical garden details with the wider landscape, explore garden path and edging inspiration at Blossom Gardens Hub. Then use the material-by-material advice below to plan an edge that suits your site rather than simply copying a look.
1. Plan the Route, Gravel Depth and Border Style
Start by deciding what the edge must do. A narrow garden path used for occasional foot traffic needs less restraint than a driveway crossed by cars, a wheelbarrow route or a frequently used path beside a sloping bed. Edging should hold the gravel within its intended footprint, but it should not create a trip hazard, block drainage or make mowing difficult. Sketch the route before buying materials, marking curves, gates, drains and places where the path meets a patio or road.
For a relaxed cottage garden, gently curving borders in brick, weathered timber or irregular stone can sit comfortably beside mixed planting. A contemporary UK courtyard or US suburban garden may suit slim black metal, straight concrete-set brick or a crisp stone line. Match the edge to nearby materials: warm red brick often relates well to a traditional house, while dark steel can pick up modern window frames. A simple material palette usually looks more coherent than using a different edging type around every turn.
Set a realistic profile
A typical pedestrian gravel path has a compacted base beneath a surface layer of gravel. The exact depth depends on the soil, gravel size and use, but a prepared base around 75–100 mm deep with a 30–50 mm gravel topping is a useful starting range for many garden paths. A driveway carrying vehicles generally needs a more substantial, engineered sub-base; do not assume a shallow path specification will withstand repeated car loads. In either case, keep the finished gravel surface slightly below the top of the edging—often about 15–25 mm—so stones are less likely to scatter over the lawn.
Check the ground after rain. On clay, water can linger, so plan a slight crossfall or another suitable drainage route rather than trapping water behind an impermeable border. On a slope, gravel tends to migrate downhill; consider shorter sections, discreet cross-stops or a more stable surface system. Before digging, check for buried services and confirm whether local permissions or restrictions apply, particularly near a public footway, shared boundary or driveway entrance.
Choose stone size and outline together
Rounded pea gravel is comfortable underfoot but moves more easily than angular stone. Angular gravel, such as a suitable crushed limestone or granite, tends to interlock and stay put better. Select a size that suits walking and wheeled access; very coarse stone can be awkward for pushchairs, while very fine material may wash or compact into a hard layer. Ask a local aggregate supplier which grading is appropriate for your soil and use.
Lay out the proposed border with a garden hose or marking paint, then walk the route. A comfortable path is commonly around 900–1,200 mm wide for one person, with extra width where two people should pass or where a car must open its doors. Make curves broad enough to install the edging without awkward cuts. For more on gravel path edging ideas that balance appearance and function, consider according to RHS Garden Design, the way paths connect planting areas and movement through the garden. Once the route works on the ground, select a border with enough depth and strength for the load.
2. Use Timber for Warm, Informal Garden Borders
Timber is a natural choice for cottage gardens, woodland paths, allotments and informal US landscapes. It is easy to cut, relatively straightforward to shape into a gentle curve and visually soft beside shrubs or a lawn. Low boards create a clear line; half-round logs or short stakes can give a more rustic effect. For a neat, long-lasting border, choose a durable timber suited to ground contact rather than untreated softwood intended for indoor use.
Options include pressure-treated pine, larch, cedar and, where available, naturally durable oak. Treatment standards differ between countries, so ask whether a product is rated for direct soil contact and follow the manufacturer’s instructions. Cedar and larch can weather attractively, while treated pine is often a practical choice where replacement cost matters. Avoid relying on a surface stain alone to protect timber buried in damp soil. Reclaimed sleepers can be useful, but check their history and treatment, especially if the edge will border edible crops or a play area.
Install boards that resist movement
For a straight path, use boards of consistent height and thickness, typically about 25–50 mm thick for light pedestrian edging. Deeper boards offer more restraint, but they need suitable support and should not be so tall that they become a trip risk. Mark the route, dig a narrow trench and set the boards so the top sits just above the planned gravel level. Place stakes on the soil side of the board, where they are less visible, and fix the board securely with exterior-rated screws or nails.
As a practical starting point, position stakes about 600–900 mm apart on straight runs, reducing the spacing to roughly 300–450 mm around curves or where soil is soft. Use a level to keep the top line even, and check alignment every few stakes rather than waiting until the whole run is fixed. Pre-drill near board ends to reduce splitting. Where lengths meet, join them over a stake or use a suitable connector; a loose butt joint can open as timber dries and shifts.
Know timber’s limits
Timber can rot, warp or lift as the ground moves. Its life depends on species, treatment, drainage and contact with wet soil, so avoid promises of a fixed lifespan. Keep the gravel surface below the board top and do not bury the timber under mulch or soil. Where standing water is common, improve drainage or select a non-wood option. Check fasteners each spring and after a freeze-thaw season, especially in colder US regions or exposed UK gardens. Replace a board promptly if it softens or breaks; a failing section can let gravel escape along the entire edge.
For a rustic look, use short, securely fixed log sections, but take care with gaps between them. Gravel can spill through wide joints, and narrow logs may roll unless restrained. Avoid using thin decorative lawn edging as a substitute for a structural board: it may look suitable at first but can bow when gravel presses against it. Timber works best for footpaths and light-duty borders. For a driveway, use robust, properly anchored sections designed for vehicle loads or choose masonry, stone or a rated metal system instead.
3. Set Brick Edging for a Classic, Structured Finish
Brick edging suits traditional UK gardens, brick-fronted homes and formal paths, and it also works well in US colonial, farmhouse and cottage-style landscapes. The material is durable, easy to coordinate with existing paving and available in colours ranging from deep red to buff and charcoal. Bricks can be laid flat, on edge or at an angle in a soldier or herringbone pattern. The pattern changes both the appearance and the amount of restraint, so choose a detail that fits the path’s use.
A flat brick border is a low, subtle divider and can be comfortable where people step across the edge. Bricks set on edge create a more prominent line and use less surface width, but need a firm bed and careful support. A diagonal pattern adds movement on a straight path, though it requires more cutting and can be less straightforward to repair. For a driveway, a narrow row of decorative bricks alone may not be strong enough to contain gravel and vehicle pressure; use a proper compacted foundation and a restrained edge system.
Prepare a stable bed
Mark the line and excavate a trench wide enough for the bricks and their bedding. On a pedestrian path, a compacted granular base and a bedding layer of sharp sand or mortar may be appropriate depending on soil and design. Mortar provides a firmer, more permanent setting but makes later changes harder. A dry-laid edge can be easier to adjust, but it depends on a well-compacted base and may shift more readily in weak or wet ground. Choose the construction to suit the expected load and local conditions rather than relying on the brick pattern to provide strength.
Set the bricks at a consistent height, checking each one with a level and a string line. Keep the upper edge slightly higher than the gravel, but low enough to avoid catching a mower wheel or creating a trip point. If laying bricks on edge, angle the trench slightly or provide a firm backing on the soil side so they cannot tip outward. A mortar haunch can add support where suitable. Let mortar cure according to the product instructions before filling the path with gravel; rushing this stage can loosen joints and spoil the line.
Plan for joints, frost and repairs
Use bricks intended for exterior paving and check that they are suitable for your climate. In regions with regular frost, a porous or damaged brick may crack when water freezes inside it. Good drainage beneath and beside the border reduces that risk. Do not use indoor facing brick as a paving edge unless the supplier confirms it is appropriate for ground exposure. Keep joints consistent, and remove mortar smears before they harden, following the mortar manufacturer’s guidance.
One common mistake is to set bricks directly on loose soil. They may look straight on installation day, then settle unevenly after heavy rain or winter frost. Another is to leave gaps at the ends of a run: gravel finds the opening and gradually spreads onto the lawn. Finish transitions neatly against a gate, paving or driveway, and secure the end bricks as carefully as the rest. Inspect the border each spring, re-bed any loose pieces and top up gravel only after correcting the cause of movement.
Brick is a strong choice when a path needs a defined, architectural edge without a tall barrier. It can also help create attractive gravel driveway border designs when paired with a suitable structural base and enough width for vehicles. Use reclaimed bricks for character only if they are sound, consistent enough to lay and appropriate for exterior use. A slightly varied colour can look charming, but uneven thickness makes a level edge harder to achieve.
4. Choose Metal for Slim, Modern and Curving Lines
Metal edging creates a narrow, crisp division between gravel, turf and planting, making it a popular option for contemporary gardens and clean-lined gravel path edging ideas. It takes up little space, so it can suit a small courtyard or a route where a broad brick border would reduce usable width. Steel, aluminium and weathering steel are common choices. Each has different strength, appearance and installation needs, so check the product specification rather than choosing by colour alone.
Galvanised steel is a practical, understated option; powder-coated steel provides a coloured finish, while weathering steel develops a rust-coloured patina. Aluminium is lightweight and resists corrosion, but a thin, flexible profile may not provide enough restraint for heavy gravel or vehicle traffic. For driveways, select an edging system explicitly rated for the expected load and install it as instructed. A light landscape strip designed for flower beds should not be assumed to hold back a car-side gravel shoulder.
Install the profile securely
Metal edging is often sold in straight sections with connectors and stakes, or in flexible lengths that can follow curves. Mark the line with a hose first, then check the manufacturer’s minimum bend radius. Tight curves can kink a profile or create a lumpy outline. Dig a narrow trench to the recommended depth, connect adjacent lengths and set the edging so the finished top is visible enough to contain gravel but not so high that it becomes a hazard.
Drive the stakes through the provided fixing points, using the spacing specified for that product. If no spacing is given, do not guess for a driveway: request the manufacturer’s guidance. On a simple footpath, extra stakes are useful at joins, curves and soft spots. Keep the metal aligned while backfilling and compacting soil on the non-gravel side. A wavy edge often results from uneven stake spacing or from trying to bend the strip after it has already been fixed. Correct the line before filling with gravel.
Consider heat, corrosion and mowing
Metal can become hot in direct sun, which matters where children or pets touch the border. A low profile reduces contact, but does not eliminate heat. In coastal areas or places exposed to road salt, choose a corrosion-resistant product and follow care instructions. Cut steel only with the right equipment and protective gear; sharp edges need to be dressed or capped. Wear gloves during installation, and do not leave exposed corners where someone could catch a shoe or hand.
Set the top carefully beside lawn. A metal edge that stands too high can obstruct a mower and lead to scalped grass or a difficult trimming strip. One nearly flush with the turf may be easier to mow over, but it must still hold gravel back. Leave enough visible height to contain the selected stone, then test the mowing approach before fixing the full run. For a bed border, keep the metal from forming a barrier that traps water around plant roots; drainage should remain possible through the profile or beneath it.
Metal edging is especially useful for long, smooth curves and modern rectangular layouts. It also makes a discreet transition between gravel and paving when carefully detailed. It is less forgiving than timber to adjust once stakes are driven, so measure and lay out the full line first. Check joins after the first heavy rain and after winter. If a section leans, correct the support rather than simply piling soil against it; loose backfill can wash away and leave the edge unstable again.
5. Build Stone Edges and Install the Whole Border Well
Stone gives a gravel path a grounded, natural appearance that works in cottage gardens, dry gardens, woodland settings and many US regional styles. Options include granite setts, limestone, sandstone, fieldstone and large river cobbles. Choose stone for the local landscape and the gravel colour, not just its catalogue appearance. A pale limestone edge beside warm golden gravel can look harmonious; dark granite may give a sharper contrast. Check that the stone is suitable for outdoor use and that its surface will not become dangerously slippery where people step on it.
Small setts can form a regular, durable line, while irregular fieldstones create a softer edge. Large cobbles make a strong visual statement but leave gaps that can collect leaves or allow fine gravel to escape. Select pieces with reasonably stable bases, and avoid a border made of loose rounded stones if the site slopes or receives heavy use. Dry-stacked stone can be attractive, but it needs a stable footing and careful placement; a mortar-set edge is more secure but less flexible to alter.
Fit stone to the path and ground
Excavate a trench wide enough to support the chosen stones, then compact the base in layers. For a low pedestrian border, a compacted granular base may be sufficient, while a taller or vehicle-adjacent stone edge may need a more substantial foundation. The right construction depends on the stone dimensions, soil and loads. If the edge will retain a significant height of soil or sit beside a driveway, seek advice from a competent landscaper or supplier instead of treating it as a simple decorative strip.
Set stones tightly enough to limit gaps, with their most stable faces down. Use a mallet and bedding material to adjust height, checking the line frequently. For irregular stone, sort pieces by size before installation and place larger, flatter pieces at corners and transitions. Backfill the soil side as you go so stones cannot roll into the path. Keep the gravel surface a little below the border top, and provide an outlet for water where a solid stone line might otherwise create a channel or pond.
Follow a reliable installation sequence
For most small garden paths, a careful sequence reduces rework regardless of edging type:
- Mark the route and confirm its width, shape, levels and connection points.
- Remove vegetation and excavate to the planned depth, checking for services before digging.
- Prepare drainage and compact the appropriate base for the path’s intended use.
- Install and secure the edging, checking height and alignment as you progress.
- Add and compact the path base if needed, then spread the surface gravel evenly.
- Rake the gravel to finish below the edging and test the route with normal foot or wheel traffic.
Late spring or early autumn is often a comfortable time to do this work in the UK and much of the US: the ground is generally workable, and extreme heat or frozen soil is less likely to complicate digging. Avoid working saturated clay, which compacts poorly, and do not install mortar or concrete products outside their stated temperature conditions. A common shortcut is to skip compaction. The edge may initially look sound, but settling then creates low spots, gaps and gravel spill. Compact in manageable layers and follow the product guidance.
Inspect the completed border after the first few heavy rains, then once or twice a year. Rake gravel back from lawns, clear leaves from joints and repair movement before it spreads. For long routes or driveway work, choose a system rated for the traffic and get professional help where levels, drainage or retaining loads are uncertain. Thoughtful gravel driveway border designs should control stone without narrowing the turning area or sending runoff onto a neighbour’s property.
Frequently Asked Questions
What is the best edging for a gravel path?
There is no single best material for every path. Timber suits informal pedestrian routes, brick offers a traditional and repairable edge, metal makes slim curves and crisp lines, and stone provides a natural, substantial border. Choose according to traffic, drainage, soil, garden style and the effort required to maintain it. For a driveway, prioritise a system designed to withstand vehicle pressure rather than selecting a light decorative product.
How to edge a gravel path so stones stay in place?
Mark the route, prepare a stable base, install edging firmly and finish the gravel surface slightly below its top. Close gaps at joins and ends, and add stakes or support where the ground is soft or the path curves. Use angular gravel if appropriate, since it generally locks together better than rounded pea gravel. On a slope, consider drainage and downhill movement; edging alone may not prevent gravel from migrating.
How deep should gravel be on a garden path?
For many pedestrian paths, a compacted base around 75–100 mm with a gravel topping around 30–50 mm is a practical starting range, not a universal specification. Soil, aggregate grading and expected use can change what is needed. A driveway requires a stronger base designed for vehicles. Ask a local aggregate or landscaping supplier to check the specification for your ground conditions before ordering.
Can I use timber edging for a gravel driveway?
Only use timber that is suitable for ground contact and robust enough for the expected load, with secure anchoring and a properly prepared base. Light landscape boards can bow or shift beside vehicles. Timber also needs inspection because wet soil can shorten its useful life. If cars will regularly cross or press against the edge, compare a rated metal, masonry or stone system, or seek professional advice.
Should gravel edging sit above or level with the path?
Usually, the border should sit slightly above the gravel surface so it contains stones, but it should not create a sharp trip hazard or obstruct mowing. A difference of roughly 15–25 mm is often a useful visual and practical starting point for a pedestrian path. Adjust for gravel size, mower clearance and how the route is used. Keep edges lower or more forgiving where people regularly step across them.
When is the best month to install path edging?
Late spring or early autumn is often suitable because the ground is usually easier to work than during a winter freeze or summer drought. The best month varies by region: avoid saturated soil, frozen ground and conditions outside the temperature guidance for mortar or other setting products. Check the forecast and allow time for any bedding or concrete to cure before adding gravel or using the route.
Conclusion
Well-planned edging keeps gravel tidy while making a path or driveway feel connected to the garden. Choose timber for warmth, brick for structure, metal for a clean line or stone for a natural finish, then size the foundation and fixings to match the actual use. Mark the route, account for drainage and check the edge after installation so small shifts do not become larger repairs. Explore more practical gravel path edging ideas and garden inspiration at Blossom Gardens Hub, and start planning a border that suits your space.
