
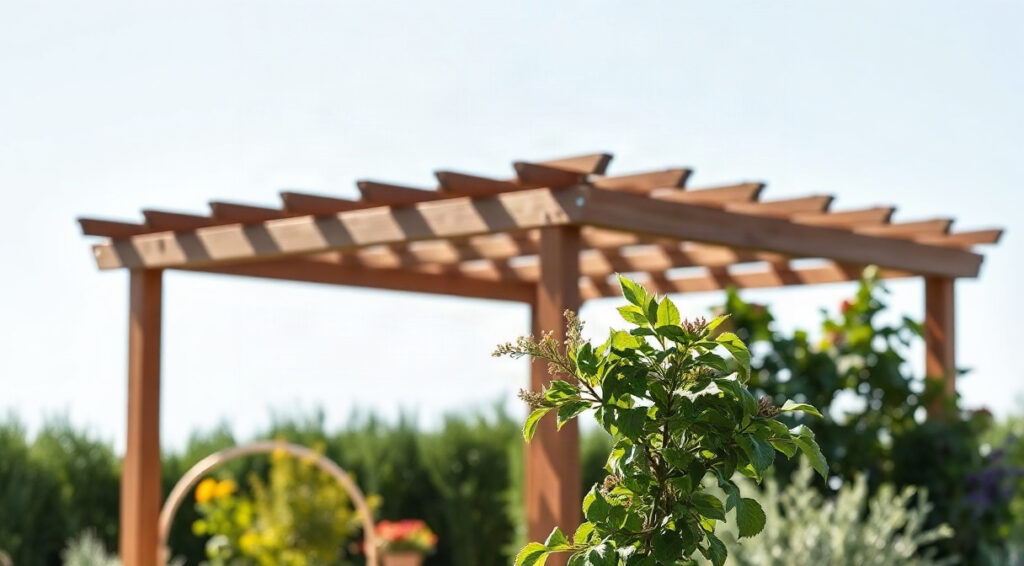
Garden focal point ideas can turn an ordinary yard into a sequence of inviting views, giving the eye somewhere to rest and helping each area feel purposeful. A focal point might be a pergola, a small water feature, a sculpture, or a striking group of plants. The strongest choices suit the scale and style of the garden rather than competing with every other feature.
In this guide, you’ll learn how to assess a view, choose a suitable feature, arrange supporting plants, and maintain the result through the seasons. The goal is not to fill every corner with decoration. It is to create a clear visual destination that makes the whole garden easier to read and more enjoyable to use.
1. Garden Focal Point Ideas Begin With the View
Before choosing a feature, spend time looking at the garden from the places where people actually see it: a kitchen window, a patio chair, the gate, or the end of a path. A focal point works because it catches the eye from a particular viewpoint. A handsome urn hidden behind a shed cannot organize the view from the house, no matter how beautiful it is up close.
Make a simple sketch of the yard and mark its main viewing points. Note the routes people take, the areas where they pause, and any existing features that already draw attention. A mature tree, a bright garden door, or a distant hill may already serve as a visual anchor. Adding a second strong feature directly beside it can create competition rather than interest.
Choose a focal hierarchy
Most gardens benefit from one primary focal point in each major view, supported by quieter details. In a small courtyard, a single bubbling basin or a Japanese maple can be enough. In a larger garden, a pergola may anchor the terrace while a bench or specimen shrub creates a secondary destination farther along a path. Give the main feature the greatest contrast, size, or visual weight.
To test a possible location, stand at the chosen viewpoint and look for the natural stopping point in the scene. A central position is not always best. Placing a feature slightly off-center can feel more relaxed and leave room for a path, planting bed, or open lawn. Avoid placing a tall object where it blocks a useful window view or hides a beautiful existing tree.
- Use a strong contrast in shape, color, texture, or height to attract attention.
- Keep the route to the feature clear, even if visitors will view it from a distance.
- Consider what will appear behind it in every season, including fences and neighboring buildings.
- Check the view from seated and standing positions before fixing the location.
Match the feature to scale
Proportion matters as much as style. A tiny ornament can disappear at the end of a long lawn, while an oversized sculpture may overwhelm a compact patio. As a practical starting point, compare the feature’s height with nearby structures and mature plants, not just the plants currently in pots. A feature should be clearly visible without making the rest of the garden feel like a frame around it.
Think about how the view changes as you approach. A feature seen from far away needs a legible outline and enough contrast to stand out. Up close, its surface, scent, movement, or sound can provide finer detail. This layered experience is a useful principle in how to design garden focal points: make the destination recognizable from a distance and rewarding at close range.
For a long, narrow plot, a feature at the far end can make the space feel deeper, especially if a path or repeated planting guides the eye toward it. In a wide garden, a central feature may help connect separate beds. For more inspiration on enclosed outdoor spaces, explore these stone and water ideas for courtyard garden design. The best location is the one that strengthens the garden’s existing lines and makes its layout easier to understand.
2. Build Structure With Hardscaping Garden Focal Points
Structures give a garden a visible framework. A pergola, arch, obelisk, low wall, or raised platform can mark a transition between outdoor rooms and provide a stable focal point in every season. These elements are especially useful when flower beds lose their color in winter. Choose a structure that has an appealing outline even when it is not covered with foliage.
For hardscaping garden focal points, first decide what the feature needs to do. A pergola might shade a dining area, while an arch can signal the entrance to a path. A low stone wall can create a place to sit and define the edge of a terrace. When a feature serves a practical purpose as well as a visual one, it is less likely to feel like decoration added without a plan.
Use a structure to create a destination
A pergola can frame a view, provide dappled shade, or link a house to a garden seating area. Before building, check how the sun moves across the site and leave enough clearance for comfortable movement beneath and around it. Climbers such as Clematis viticella varieties can soften the posts without becoming as heavy as a vigorous wisteria. Tie new stems loosely to horizontal wires and prune according to the plant’s flowering group.
An arch works best when it clearly marks a threshold. Set it where a path changes direction or where one garden area gives way to another, rather than placing it randomly in the middle of a lawn. Allow enough width for people to pass comfortably, and avoid crowding the posts with plants that will spill into the walkway. A pair of matching posts or containers can help the entrance read as intentional.
Raised beds and low walls can also organize space. A retaining wall may hold a level terrace on a sloping site, while a low seat wall makes a patio feel defined. Keep materials consistent with the house or paving where possible. Too many competing stone colors, edging styles, and timber finishes can make a small garden feel visually fragmented.
Plan the construction details
Strong design depends on groundwork that is easy to overlook. Check local rules before building a tall structure, and locate underground services before digging post holes. Posts need appropriate footings for the soil and wind exposure; simply pushing them into loose soil can lead to movement or rot. On a slope, a level landing or properly designed retaining feature may be safer and more useful than an improvised step.
Materials should suit the conditions. Pressure-treated timber, naturally durable wood, powder-coated metal, brick, and stone each weather differently. Consider how a surface will look after several winters, not only when newly installed. A dark metal arch can disappear against dense greenery but stand out against pale gravel. Light stone can become a bright visual anchor in a shaded courtyard.
- Measure the space and mark the proposed footprint with stakes or a hose.
- Walk around the outline to check clearance, access, and viewing angles.
- Confirm drainage, ground stability, and any local building requirements.
- Choose finishes that relate to existing paving, fences, or house materials.
Think of hardscaping garden focal points as permanent bones rather than isolated objects. Their placement should leave room for mature planting and maintenance access. A pergola close to a boundary may need a narrow but reachable strip behind it; otherwise, weeds and leaves can become difficult to manage. A path leading to a bench should be wide enough for regular use and should not drain toward the seating area.
Garden structures can also provide useful vertical support in a compact yard. For practical design and construction inspiration, see this guide to building a pergola on a patio. For broader principles of garden layout and visual composition, consult according to RHS Garden Design. Build the feature to fit the site, then let planting soften its edges rather than hiding its purpose.
3. Make Sculpture and Water Features Feel at Home
Sculpture can supply a memorable shape when a garden lacks a strong natural anchor. It might be a carved stone sphere, a simple metal form, a classical urn, or an abstract piece that echoes the lines of the house. The right object does not need to be large. It needs a considered position, a suitable backdrop, and enough breathing space to be seen clearly.
Start by observing how the material responds to its setting. Pale stone can glow against dark evergreen foliage, while rusted metal can blend beautifully with grasses and warm brick. A glossy, bright-colored ornament may be better suited to a restrained planting scheme than to a bed already full of vivid blooms. Repeat one material elsewhere, perhaps in a pot or edging detail, to make the focal point feel connected to the garden.
Give an ornament a deliberate setting
Set a small sculpture on a stable plinth, broad paving stone, or low pedestal so it does not disappear among groundcovers. Leave a clear margin around it; closely packed plants can obscure its outline and make maintenance awkward. A simple circle of gravel or a clipped groundcover can define the base without turning it into a formal display. Check that rainwater drains away rather than collecting around the footing.
Use background contrast to help the object read. A pale statue may be difficult to see against a light fence, but a dark evergreen hedge can make its outline clear. Conversely, a dark sculpture may need a lighter wall or soft foliage behind it. Test the position with a temporary stand-in, such as a cardboard outline or an empty planter of similar size, before committing to a heavy object.
Not every focal point needs to be visible from every angle. A garden can reveal a sculpture gradually around a bend, creating a small moment of discovery. Keep it visible enough to invite attention, but avoid placing it where it blocks a path or forces people to step into a planting bed to look closely. The approach is part of the composition.
Use water for movement and sound
A water feature adds reflection, sound, and changing light. A shallow basin can suit a compact patio, while a small recirculating fountain may make a seating area feel calmer. Place it where the sound can be enjoyed but will not compete with conversation or disturb nearby neighbors. Check access to power and water before choosing a pump system, and follow the manufacturer’s instructions for safe installation.
Water features need routine care. Remove fallen leaves before they decompose, check pumps regularly, and top up water during warm, dry weather. In climates with freezing winters, use a model and winter routine suited to local conditions; leaving water in a vulnerable pump can cause damage. A wildlife-friendly pond needs shallow access and suitable planting as well as open water. For more ideas, read these small-garden wildlife pond plans.
Balance is important when selecting garden focal point ideas for a small space. A dramatic fountain, several bright pots, and an elaborate sculpture may each demand attention, but together they can make the garden feel crowded. Choose one lead feature and let the others support it through repeated materials or quieter forms. University guidance on landscape planning, such as University of Minnesota Extension’s landscape design advice, can help you think about how features relate to the whole site.
4. Use Plant Arrangements to Frame the Focal Point
Plants can be the focal point themselves or form the living frame around a structure, sculpture, or water feature. A carefully placed specimen tree, a mass of ornamental grass, or a flowering shrub can give the eye a destination that changes through the year. The most dependable displays combine a clear outline with a limited palette, rather than relying on many different flowers blooming at once.
Choose plants according to light, soil, moisture, and mature size. A Japanese maple such as Acer palmatum ‘Bloodgood’ can provide deep red foliage and a branching silhouette, but it needs a suitable position and protection from harsh drying winds. A compact evergreen shrub may be a better year-round anchor where the site is exposed. Confirm the plant’s expected spread before setting it near a path, wall, or water feature.
Build a frame in layers
Arrange supporting plants in three broad layers: a taller backdrop, a middle layer that connects the feature to the bed, and a low edge that softens hard surfaces. For a garden bench, a screen of upright shrubs behind it can create enclosure, while flowering perennials on either side make the seat feel settled. Leave the central view open so the supporting planting does not swallow the feature.
Repeat a small number of plants to create rhythm. For example, use three groups of Hakonechloa macra around a shaded stone basin, with a few ferns repeating the same soft texture nearby. Repetition helps the eye connect separate parts of the garden. Scattering a single plant of every kind can make the bed look busy and weaken the focal point.
Plan spacing for mature growth, not the size of nursery pots. If a shrub is expected to reach 1.2 metres wide, leave roughly that much room from its center to the next plant or hard edge, adjusting for the desired effect and local growing conditions. Crowding plants to make a new bed look full often leads to poor airflow, constant pruning, and hidden features within a few seasons.
Plan for seasonal interest
Layer plants so the focal area remains attractive beyond one flowering window. A spring bulb drift can lead into summer perennials, while grasses, seedheads, bark, or evergreen foliage carry the scene into autumn and winter. A simple combination might include spring bulbs beneath a deciduous shrub, summer blooms at the front, and an evergreen structure behind them. Choose a few reliable plants for the conditions instead of trying to make every month equally colorful.
Pay attention to mature height. A tall plant placed directly in front of a low sculpture can hide it by July, even if the composition looked open in April. Put taller plants behind the feature or to one side, and use low, fine-textured plants near its base. Maintain a clear view corridor from the main seating area or window, trimming only when the plant’s natural shape and flowering cycle allow it.
Color can direct attention, but contrast should be intentional. A bright yellow flower near a subdued stone feature can pull the eye away from the intended destination. Repeat the feature’s color in small amounts elsewhere, such as in foliage, a pot, or a few flowers, to create a visual connection. For a white-flowering shrub that is meant to anchor a bed, investigate why a hydrangea may not be blooming before assuming it is a poor choice.
In how to design garden focal points, the planting is not merely a decorative border. It manages scale, softens edges, and directs attention. For reliable results, draw the feature and mature plant outlines on paper, then mark the planting positions with temporary pots. View the arrangement from the main approach before planting. This small rehearsal can reveal a crowded sightline or an awkward gap while changes are still easy.
5. Connect the Feature to Paths, Views, and Upkeep
A focal point feels convincing when the surrounding layout leads naturally toward it. A path can point to a bench, paving can open around a water basin, or a gap in a hedge can reveal a sculpture. The route does not have to be straight. A gentle curve can create anticipation, provided people can still see where they are going and the surface is safe to walk on.
Plan the approach and the destination together. A narrow path that ends at a broad seating space can make the arrival feel generous, while a feature placed beside a path may need an area where visitors can pause without blocking others. Use a consistent paving material to connect the route to the feature, or introduce a subtle change in texture where one garden room begins.
Check how the garden reads in real use
Mark the proposed path and feature position on the ground with a hose, string, or temporary pots. Walk it in both directions, carry a garden basket along it, and imagine using the space after rain. A path that looks elegant on a sketch may be too narrow for a wheelbarrow or may cut through a planting bed that needs regular access. Adjusting the layout before construction can prevent awkward daily compromises.
Pay attention to sightlines from inside the home as well as from the path. A focal feature that looks balanced from the patio may be hidden from the kitchen window by a tall shrub. Sit at the table, stand at the sink, and look out at different times of day. If a light or reflective surface is part of the design, consider whether it will cause glare through a window.
Consider levels and drainage, particularly where a structure, statue, or paved area is heavy. Water should not collect around foundations or flow toward the house. If you are changing the grade, plan how runoff will move and whether retaining work is needed. A level surface may improve access and make a focal feature more usable; this guide explains practical steps for leveling a garden.
Maintain the composition as it matures
Once the feature is in place, check it through a full growing season. Plants may grow faster than expected, a container may dry out quickly beside paving, and reflections can shift as the sun moves. Take a photograph from the main viewpoint in spring, summer, and winter. Comparing the images can show whether the feature stays legible or becomes lost when foliage fills in.
Keep maintenance simple by choosing plants suited to the site and leaving access around the feature. Remove weeds before they set seed, clear leaves from drains and basins, and prune plants to preserve the intended sightline. Avoid repeatedly shearing every shrub into tight shapes unless that formal look is deliberate; excessive cutting can create dense outer growth and bare interiors.
- Check that paths remain clear and surfaces are stable after heavy rain.
- Trim only the growth that blocks a view or interferes with safe access.
- Inspect timber, metal, stone, pumps, and fixings for wear each season.
- Replace a struggling plant with a better-suited choice instead of repeatedly forcing it to thrive.
For hardscaping garden focal points, long-term success depends on the relationship between durable materials and living growth. Leave room for plants to mature, but do not let them conceal structural details that need inspection. Keep an access route to pumps, fasteners, and drainage points. If the feature has lighting, angle it to reveal texture without shining directly into windows or creating unnecessary glare.
Good garden focal point ideas also allow the design to evolve. You can change seasonal containers, add bulbs beneath a tree, or adjust a path edge without moving the main structure. That flexibility is valuable because gardens are living spaces: plants change, family needs shift, and the most useful view may become clearer with time. Make the anchor stable, then refine the supporting details as you learn how the space is used.
Frequently Asked Questions
What makes a good garden focal point?
A good focal point is easy to notice from a chosen viewpoint and suits the scale and style of the space. It might be a structure, sculpture, water feature, specimen plant, or a combination. Give it a clear setting and avoid surrounding it with several equally strong features.
How many focal points should a garden have?
Most small gardens need one main focal point, while larger gardens can use several anchors for different views or outdoor rooms. Make one feature dominant in each view and use quieter details to connect the areas. Too many competing ornaments can make the layout feel cluttered.
Where should I place a focal point?
Start with the view from a window, patio, gate, or seating area. Place the feature where it can be seen clearly and where it supports a path or garden destination. Test the position with a temporary marker and check the view from both standing and seated height.
Can plants serve as garden focal points?
Yes. A small ornamental tree, a strongly shaped shrub, or a mass of grasses can anchor a view. Choose plants for local light and soil conditions, and check mature size before planting. Layer supporting plants around the anchor without obscuring its outline.
How can I make a focal point stand out in a small garden?
Choose one feature with a clear silhouette, then use restrained planting and a simple backdrop to give it space. A compact basin, a distinctive container, or a slim arch can work well. Avoid oversized structures and leave enough room to move comfortably around the feature.
Do focal points need to be expensive?
No. A carefully placed specimen plant, a well-made bench, or a reclaimed stone can provide visual focus without elaborate construction. Concentrate effort on location, proportion, and planting. Reusing a suitable object or building a feature in stages can also help keep the project manageable.
Conclusion
Successful focal points begin with a clear view and a feature that fits the garden’s scale. Use structures to shape outdoor rooms, sculpture or water to create interest, and layered planting to frame the destination without hiding it. Test the layout before building, plan for mature growth, and keep paths and maintenance access practical. With thoughtful choices, garden focal point ideas can make outdoor space feel more organized, welcoming, and distinctly yours. Explore more inspiration and practical gardening guides at Blossom Gardens Hub, then choose one view in your garden to improve first.
