
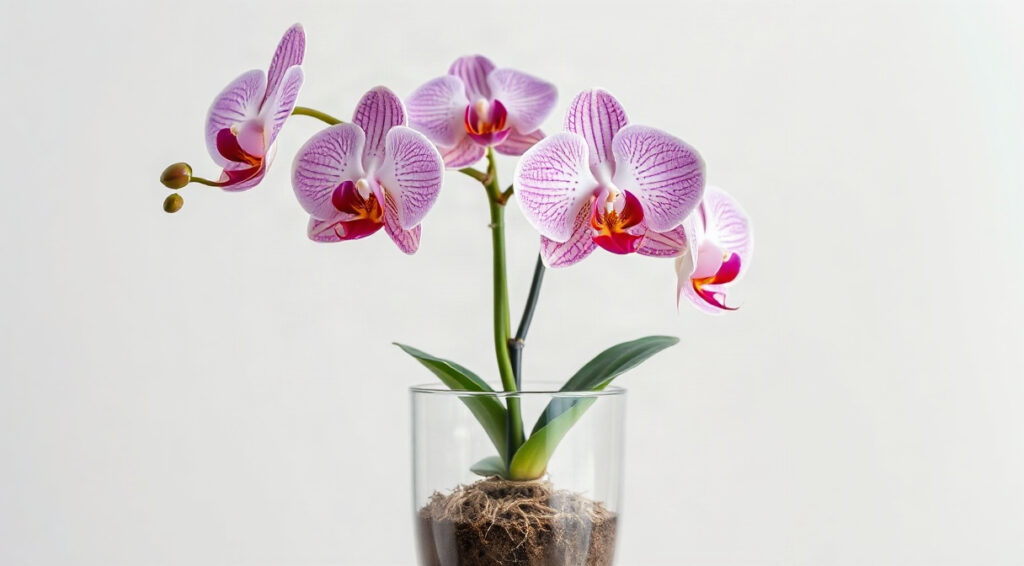
Orchid care for beginners is easier when you understand what a Phalaenopsis orchid needs at its roots: bright filtered light, an airy potting mix, and watering only when that mix is nearly dry. These popular moth orchids can flower for weeks or months indoors, and they do not need complicated daily attention. A few reliable checks are more useful than following a rigid weekly schedule.
This guide explains how to choose a suitable spot, judge when to water, maintain a comfortable indoor environment, and recognize when to repot. It also covers common problems and simple seasonal adjustments, so you can respond to what your plant is showing rather than guess.
Orchid care for beginners: Find the Right Light
Phalaenopsis orchids grow naturally in warm, humid regions, where they receive filtered light beneath a leafy canopy. Indoors, aim for bright, indirect light for much of the day. An east-facing window is often a good starting point because it provides gentle morning sun. A south- or west-facing window can also work if a sheer curtain softens strong rays or the plant sits a little back from the glass.
Leaf color offers a useful clue. Healthy leaves are generally medium green and firm. Very dark green leaves may mean the plant is getting too little light, while yellowing, faded patches, or dry reddish areas can signal excess direct sun. Check the leaves every week or two, especially after moving the pot or as the sun’s angle changes between seasons.
Choose a window by watching the sun
Put the orchid where it can see plenty of daylight without sitting in intense midday sun. If you are unsure how strong the light is, observe the window at different times for a day. A soft-edged shadow beside the pot usually suggests gentler light; a sharp, hot beam landing on the leaves for hours is a warning to add a curtain or move the plant.
Keep leaves from touching cold window glass in winter. On the other hand, placing the pot in a dim corner simply because orchids are often described as shade plants can limit flowering. If the plant grows healthy new leaves but has not bloomed again, inadequate light is one possible cause. Increase brightness gradually rather than moving it straight into full sun.
Use artificial light when needed
A bright LED grow light can help if your rooms have few suitable windows. Position it according to the manufacturer’s distance guidance and provide a regular day-night cycle, often around 12 to 14 hours of light daily. Avoid leaving a powerful lamp close to the leaves for long periods; heat and excessive intensity can scorch them. A timer makes the routine consistent without requiring daily adjustment.
Rotate the pot a little every week or two if the plant leans toward the window. Do not twist it repeatedly while a flower spike is developing, because changing the light direction can cause the spike to turn or the buds to drop. If you enjoy other indoor flowering plants, our guide to growing scented jasmine indoors explains how their light preferences compare.
- Good starting point: bright, filtered light near an east-facing window.
- Too much sun: persistent hot, direct rays or pale, scorched patches on leaves.
- Too little light: very dark foliage and weak or absent flowering over time.
For orchid care for beginners, judge the spot by the plant’s growth as well as the window direction. A healthy orchid may take time to rebloom, so do not keep moving it every few days in search of a quick flower spike. Make one sensible adjustment, then observe new growth over several weeks.
Orchid care for beginners: Water by Checking the Roots
There is no dependable rule that every Phalaenopsis needs water on the same weekday. Pot size, bark grade, room temperature, airflow, and season all change how quickly the mix dries. A practical phalaenopsis watering guide begins with checking the pot, not the calendar: water when the mix is nearly dry and the roots look silvery rather than green. In a typical warm home, this may mean watering about every 7 to 10 days, but use that only as a starting estimate.
Clear plastic nursery pots make root checks easy. Green roots usually indicate they are hydrated; silvery-gray roots are often ready for water. Look down into the pot and feel the bark near the surface. If it still feels damp or the pot is heavy, wait and check again in a day or two. A wooden skewer inserted carefully into the mix can also reveal lingering moisture, though avoid piercing roots.
Water thoroughly, then let the pot drain
When it is time, take the orchid to a sink and run room-temperature water through the potting mix until the bark is evenly wetted. Let all excess water drain away before returning the pot to its decorative cover. Another option is briefly soaking the nursery pot, then draining it completely. Never leave the pot standing in water: roots need air, and continually wet conditions can encourage rot.
Keep water out of the crown, the central point where the leaves meet. If water collects there, gently blot it with a clean tissue or tilt the plant so it runs off. Water trapped between leaves, especially in a cool room overnight, can damage tissue. Watering the mix directly is the easiest way to reduce this risk.
Adapt frequency to your home
Warm, dry rooms and small pots of coarse bark may dry quickly. Cool rooms, larger pots, dense moss, and low airflow can hold moisture longer. In winter, indoor heating may dry the air while lower light slows plant growth; do not assume these effects cancel each other out. Check the roots and mix each time rather than increasing watering automatically.
Tap water is generally suitable if it is safe for household use, though very hard water can leave mineral deposits over time. If you see a crust on the pot or mix, occasionally flush the pot with plenty of clean water. Room-temperature water is kinder than very cold water. Avoid softener-treated water when possible because it may contain salts that orchids do not tolerate well.
- Check root color, pot weight, and the moisture within the mix.
- Water only when the pot is close to dry.
- Soak the bark thoroughly, then allow the pot to drain fully.
- Empty the cachepot or saucer before putting the orchid back.
Yellow, mushy roots and a sour smell can point to too much moisture or old, compacted mix. Wrinkled leaves may indicate dehydration, but they can also follow root damage, so do not respond by repeatedly adding water without checking the roots. A careful phalaenopsis watering guide is about matching water to drying conditions. That steady habit is central to orchid care for beginners.
Build a Comfortable Indoor Environment
Phalaenopsis orchids are comfortable in the temperatures found in many homes. A useful general range is about 65 to 80°F (18 to 27°C) during the day, with nights a little cooler. Short, mild nighttime drops can help a mature plant initiate a flower spike in autumn, but sudden chills are not a reliable shortcut. Keep the orchid away from cold drafts, heating vents, radiators, and hot air from appliances.
Consistency matters more than chasing an exact number. A thermometer near the plant can help you spot extremes, particularly on a bright windowsill or above a radiator. Do not place the pot against a cold pane during winter nights. If a window area becomes chilly, move it slightly inward while preserving its bright, indirect light.
Humidity and airflow work together
Household humidity is often adequate if the room feels comfortable to people, though Phalaenopsis generally appreciate moderate humidity. If the air is very dry, group plants together or set the orchid above a tray of pebbles and water. Keep the pot base above the waterline; the aim is to increase local evaporation without soaking the roots. A small room humidifier can also help, provided it is cleaned and does not blow directly onto the leaves.
Misting is not a substitute for watering or steady humidity. It can leave droplets in the crown and on nearby surfaces, while providing only a brief effect. Gentle air movement helps leaves and the potting mix dry evenly. A fan on a low setting across the room can be useful, but strong, constant airflow may dry the plant too quickly.
Feed lightly and keep the plant clean
During active leaf or root growth, use a balanced fertilizer formulated for orchids, diluted according to its label. Many growers apply a weak solution every few waterings, then flush the mix with plain water periodically to limit salt buildup. Do not fertilize a dry root system; water first or feed when the potting mix is already moist. Follow product directions rather than assuming that more food means more flowers.
Growth often slows in darker winter conditions. Reduce feeding if the plant is not actively growing, and resume a light routine when new roots or leaves appear. Wipe dusty leaves with a damp, soft cloth so they can use available light effectively. Avoid polishing products, which may leave a coating on the leaf surface.
Check the plant briefly when you water. Look beneath leaves and around flower spikes for scale, mealybugs, or sticky residue. Isolate a plant with suspected pests from other houseplants while you identify the issue. Remove dead flowers and dry leaf debris with clean tools, but do not cut into firm, healthy tissue just to make the plant look tidy.
As according to Royal Horticultural Society, houseplants benefit from conditions suited to their growth, so use your room and plant as guides rather than relying on one universal formula. For a warm-weather check on another indoor species, see our advice on managing fuchsia care through winter. Keeping conditions steady supports orchid care for beginners without turning plant care into a daily chore.
Know When and How to Repot
Phalaenopsis orchids are commonly grown in chunky bark or a bark-based mix that lets air reach their roots. That mix gradually breaks down, holds more water, and loses its airy structure. Repotting is usually needed every one to three years, depending on the material and conditions, rather than simply because roots have grown over the pot’s edge. Roots growing outside the pot can be perfectly normal for an epiphytic orchid.
Useful orchid repotting signs include bark that is soft or decomposing, a mix that stays wet much longer than it used to, roots that are mostly brown and mushy, or a plant that rocks because its base is unstable. A sour or swampy smell is another reason to inspect the root zone. A crowded-looking pot by itself does not prove the orchid needs a larger container.
Choose the right moment and supplies
The best time to repot is usually after flowering, when new roots are beginning to grow. For many indoor plants that is spring or early summer, but follow the orchid’s growth rather than the calendar alone. New root tips help the plant settle into fresh mix. If the current mix is breaking down and roots are rotting, repot promptly even if the plant is flowering; preserving healthy roots is more important than waiting for an ideal season.
Gather a clean pot with drainage holes, fresh orchid bark or a suitable Phalaenopsis mix, and clean scissors or pruners. Choose a pot only large enough to hold the healthy roots comfortably, often the same size as the old one. An oversized pot contains more damp mix around the roots and can dry too slowly. Rinse new bark if its instructions recommend it, and prepare a clean work surface.
Repot in a calm, careful sequence
- Water the orchid lightly beforehand if its roots are very dry and brittle.
- Slide it from the pot and gently loosen old bark from around the roots.
- Rinse or brush away loose material so you can inspect the root system.
- With clean scissors, remove only roots that are clearly dead, hollow, or mushy.
- Set the orchid in the pot and work fresh mix between the roots without crushing them.
- Keep the crown above the mix, then wait a few days before the next thorough watering if roots were cut.
Healthy roots are generally firm and green when wet or silvery when dry. Some may be yellow from growing inside the pot, and that color alone does not mean they are dead. A firm root should not be cut just because it looks untidy. Leave aerial roots outside if they resist gentle positioning; forcing them into a pot can break them.
After repotting, anchor the orchid so it does not wobble, but do not pack bark so tightly that airflow is lost. Keep it in its familiar bright, indirect light and avoid fertilizing until new growth resumes. The plant may pause briefly while it adjusts. Monitor moisture closely because fresh bark may dry differently from the old mix.
These orchid repotting signs help distinguish normal root growth from a mix that has genuinely become unsuitable. For orchid care for beginners, one of the most common mistakes is repotting into a decorative pot without drainage. Water then collects unseen around the roots, increasing the risk of rot. Keep the grow pot’s drainage holes open, and empty any outer container after watering.
Maintain a Simple Routine and Troubleshoot Changes
A short weekly check is usually enough to catch changes early. Look at the roots, the surface of the potting mix, the leaves, and any active flower spike. Water only when the root and mix checks indicate it is time. Turn attention to the plant more often during a heatwave, after a move, or when it has just been repotted, but avoid changing several care conditions at once.
Keep a simple note of when you watered and whether the pot felt light or heavy. After a few weeks, you will see how quickly your particular pot dries in your home. This is more useful than copying someone else’s schedule because their climate, pot, and growing medium may differ. It also helps you notice if the mix begins to retain water longer as it ages.
Read the leaves and roots together
A single yellow leaf at the bottom of an otherwise healthy orchid may simply be natural aging. If several leaves yellow quickly, inspect the roots and check whether the plant is receiving too much direct sun or staying wet for too long. Soft, dark roots suggest damage; firm, wrinkled roots may point to dehydration or a root system that cannot take up water effectively.
Wrinkled leaves are not an instruction to water immediately. First inspect the roots. If most roots are damaged, adding more water will not restore them and can worsen rot. Remove only dead roots during repotting, use an airy medium, and allow the plant time to establish fresh roots. If the roots are firm but the mix is dry, water thoroughly and reassess rather than soaking the pot repeatedly.
Handle blooms and flower spikes thoughtfully
Flowers naturally fade after their display, and a finished bloom does not mean the orchid is dying. If the flower spike turns brown and dry, cut it near the base with a clean tool. If it remains green, you can leave it in place or trim above a visible node to encourage a side branch. A new branch is possible, not guaranteed, and the plant may produce fewer flowers than on a fresh spike.
After blooming, prioritize healthy leaves and roots rather than trying to force a second flush. Provide bright filtered light, steady temperatures, and measured watering. Some mature plants form new spikes when nights become slightly cooler in autumn. Avoid drastic temperature changes or withholding water to trigger flowers; stress can set back growth instead of encouraging it.
- One old lower leaf yellowing: observe whether new leaves and roots remain healthy.
- Roots soft or foul-smelling: inspect the mix and consider timely repotting.
- Healthy foliage but no flowers: review light levels and seasonal temperature patterns.
- Bud drop: check for sudden changes in temperature, drafts, or a recent move.
A dependable phalaenopsis watering guide becomes personal as you learn how fast the pot dries. Combine those observations with the orchid repotting signs above, and you can make measured adjustments before small issues become major ones. This is the practical heart of orchid care for beginners: observe, change one thing at a time, and give the plant time to respond.
The Royal Botanic Gardens, Kew publishes further plant care guidance worth reading alongside this guide.
Frequently Asked Questions
How often should I water a Phalaenopsis orchid?
Check the roots and potting mix rather than following a fixed schedule. Many indoor orchids need water roughly every 7 to 10 days in warm conditions, but cool rooms, dense moss, and larger pots can take longer to dry. Water thoroughly only when the mix is nearly dry, then drain the pot completely.
Can a Phalaenopsis orchid grow in a room without a window?
It can grow under a suitable LED grow light, set at the recommended distance and used on a regular day-night cycle. A dim room with no window and no grow light will usually provide too little energy for strong growth and flowering. Keep the lamp from overheating the leaves.
Should I cut off aerial roots?
No. Aerial roots are a normal feature of Phalaenopsis orchids and help them take up moisture from the air. Leave firm roots in place, even when they extend beyond the pot. Trim roots only when they are clearly dead, hollow, or mushy, using clean scissors.
Is a yellow orchid leaf always a sign of trouble?
Not necessarily. One older lower leaf may yellow and fall as part of normal growth. Multiple yellow leaves, sudden changes, or yellowing paired with soft roots deserve closer inspection. Check light exposure, watering, and the condition of the potting mix before deciding what to change.
When should I repot my orchid after it blooms?
Repotting after flowering, as new roots begin to grow, is often a good time. Do not wait if the bark has broken down, the pot remains wet too long, or the roots are rotting. Choose a snug pot with drainage and fresh, airy orchid mix.
Will my orchid flower again?
Many healthy Phalaenopsis orchids bloom again when they receive enough filtered light, suitable temperatures, and steady root care. A slightly cooler night period in autumn may help trigger a flower spike, but timing varies. Keep caring for the leaves and roots after flowers fade rather than trying to force a quick rebloom.
Conclusion
Thriving Phalaenopsis orchids do not require complicated equipment or a rigid schedule. Give yours bright, indirect light, check the roots before watering, let the pot drain, and repot when the medium breaks down or roots show clear distress. With a little observation, orchid care for beginners becomes a repeatable routine instead of guesswork.
Choose one check to start today: assess your orchid’s light, inspect its roots, or note how quickly its potting mix dries. For more practical ideas for a greener home and garden, explore Blossom Gardens Hub’s gardening guides.
