
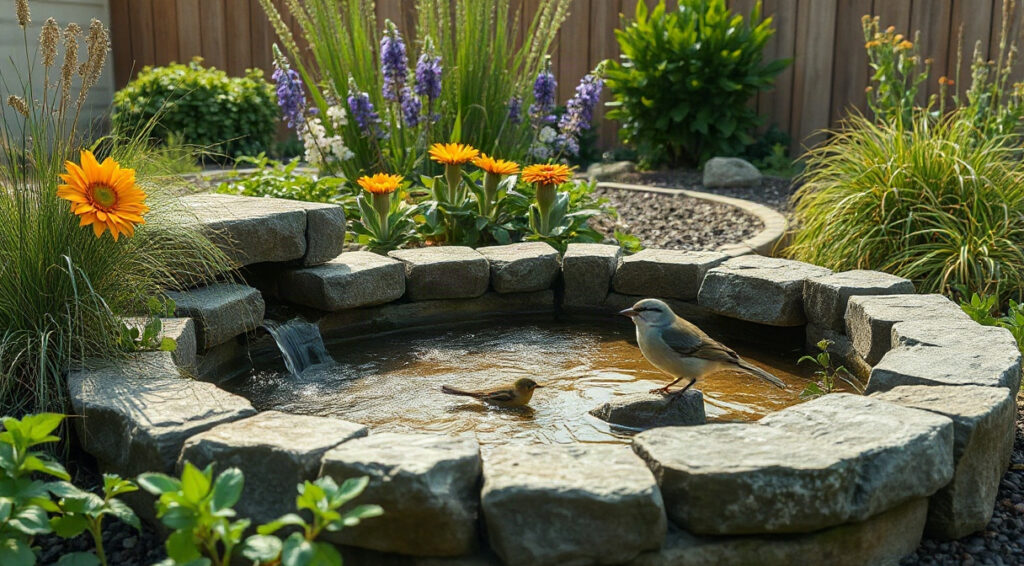
Rain garden design can turn water that rushes off a roof, driveway, or compacted lawn into a useful landscape feature. Instead of letting every storm send runoff toward a path or low spot, a planted shallow basin holds some water temporarily while it soaks into suitable soil. Native flowers, grasses, and sedges make the space attractive and provide food and cover for local wildlife. A well-sited garden can be a practical part of a backyard flood prevention garden, although it cannot solve every drainage problem or replace a properly designed stormwater system. The steps below cover site checks, sizing, plant selection, construction, and ongoing care so you can plan a resilient feature that fits your yard.
1. Choose a Safe Site and Understand the Runoff
Start by following the water during a heavy rain. Note where roof downspouts discharge, where paved surfaces shed water, and whether a lawn stays soggy after the storm has passed. A rain garden works best when runoff can reach it by a shallow, stable route, such as a downspout extension, grass swale, or stone-lined channel. It should be positioned to receive water without sending it toward a house, garage, neighbor’s property, or public walkway.
Keep the basin downhill from buildings, but respect local guidance for setbacks from foundations, wells, septic systems, buried utilities, and steep slopes. Distances differ by location and soil, so check with your local stormwater or extension office before digging. Call your utility-location service before any excavation; even a small backyard basin can intersect shallow cables or pipes. Avoid sites where water already stands for days, where the ground is contaminated, or where excavation could destabilize a slope.
Check how quickly the soil drains
A simple infiltration test helps reveal whether the proposed spot can accept water. Dig a hole about 12 inches deep, fill it with water, and let it drain once to pre-wet the surrounding soil. Refill it, then check the water level at regular intervals. Record the time rather than relying on a quick visual impression. If water remains for a long time, or the soil is dense clay, the site may need a smaller garden, a different location, or professional advice. Local design standards set acceptable infiltration rates and may require a drainage assessment, especially for larger contributing areas.
Do not assume a test in one corner represents the whole yard. Compaction, fill soil, tree roots, and buried construction debris can change drainage within a few feet. Test more than one possible location if results vary. A garden should drain between storms; prolonged standing water can stress plants and encourage mosquitoes. A shallow basin is designed to hold water temporarily, not function as a permanent pond.
Estimate the water source
Identify the surfaces feeding the garden and estimate their area. A roof section draining through one downspout is easier to manage than runoff from an entire paved driveway. Start with one manageable source, then expand only when you understand the soil and overflow route. Some local programs publish sizing worksheets based on drainage area, soil, and design rainfall. Use those rather than relying on a universal size rule: rainfall patterns, regulations, and infiltration vary widely.
- Observe runoff during rain and mark the intended flow path.
- Measure the contributing roof or pavement area as accurately as practical.
- Check soil drainage, slope, utilities, and local setback requirements.
- Plan a safe overflow route for storms larger than the basin can hold.
This first assessment is the foundation of a dependable rain garden design. For more planting and garden-planning inspiration, explore the resources at Blossom Gardens Hub.
2. Size and Shape the Basin for Realistic Storms
A rain garden is usually a broad, shallow depression with a level bottom, gently sloping sides, and a defined overflow point. The basin captures incoming runoff for a short period, while the soil and plants help it infiltrate. Shape it to suit the yard rather than forcing a rigid circle into an awkward spot. A kidney-shaped bed can follow a lawn edge, while a long, narrow basin may fit between a downspout and a planting border. Leave enough access to weed, divide plants, and remove sediment without trampling the entire bed.
Size the garden using the measured drainage area, soil conditions, and local rainfall guidance. A larger roof area delivers more water, but simply making a deeper hole is not a safe shortcut. Deep, steep-sided basins can erode, be difficult to maintain, and hold water longer than intended. If space is limited, consider directing only part of the runoff into the garden or building more than one smaller basin. A rain barrel, permeable path, or planted swale can also reduce the volume reaching a single feature.
Set a shallow holding depth and overflow
Many residential designs use a modest ponding depth, commonly around 6 to 8 inches, but local requirements and site conditions take priority. Mark the finished basin edge and intended water level before digging. The bottom should be nearly level across its width so water spreads through the planting area instead of rushing to one end. Use a level or a water-filled hose to check the grade. A slight error can concentrate flow and wash mulch or young plants away.
Include a stable overflow at the lowest edge. This might be a broad, grassed spillway or a stone-protected notch that sends excess water to a safe lawn area. The overflow should not discharge onto a neighbor’s lot, erodible slope, or foundation. Its route matters as much as the basin itself: a rain garden cannot prevent flooding if extreme rainfall simply escapes toward the house. Check local rules if runoff connects to a street drain or public right-of-way.
Draw the layout before you dig
Sketch the garden with the inlet, basin, planting zones, and overflow clearly labeled. Include existing trees and paths, and plan how the feature will look from windows or outdoor seating. A gentle crescent can frame a patio; a long bed can soften the edge of a lawn. If the garden is near a downspout, use a splash pad or stone apron to slow the incoming flow and spread it across the basin. Avoid a narrow, steep channel that cuts a trench through the planting.
- Mark the basin perimeter with a hose or garden line.
- Mark the inlet and overflow, then confirm water will move between them safely.
- Check that the basin bottom can be made level and accessible.
- Revise the outline if it conflicts with roots, utilities, or regular yard use.
A common mistake is to excavate first and decide where the overflow goes later. That often leaves no safe path for excess water, so storms can erode the rim or send runoff in the wrong direction. Planning the whole flow route before digging makes a rain garden design more reliable and easier to maintain.
3. Select Native Plants for Wet and Dry Zones
A native plant rain garden is most successful when the species suit both the local climate and the changing moisture levels in the basin. The bottom may be briefly wet after a storm and dry between rains, while the upper edge stays comparatively dry. Choose plants native to your region, not simply plants labeled “native” without checking the species’ natural range. A local native-plant society, botanical garden, or extension service can recommend species and ecotypes that support nearby pollinators and tolerate your conditions.
Think in layers: plants for the basin floor, adaptable species for the middle, and drought-tolerant choices along the rim. This avoids placing a moisture-loving plant on a dry edge or a drought-adapted species in the wettest pocket. Native plants do not all tolerate standing water, and even wet-meadow species need the water to recede. Match each plant’s preferred soil moisture, light, mature size, and growth habit to its exact position.
Build a region-appropriate palette
In parts of eastern North America, blue flag iris (Iris versicolor) and swamp milkweed (Asclepias incarnata) may suit a moist basin, while little bluestem (Schizachyrium scoparium) and purple coneflower (Echinacea purpurea) can work higher on a sunny slope. In other regions, these plants may be unsuitable or non-native, so treat them as examples rather than a universal recipe. Ask a local supplier for equivalent regional species. In the Pacific Northwest, for example, a locally appropriate sedge or rush may offer a better fit than a plant chosen from an eastern planting list.
Include plants with different bloom times and structures. Early flowers can feed emerging bees, summer blooms attract pollinators, and seed heads provide food or winter interest. Grasses and sedges add texture and help hold soil, while flowering perennials bring color. Leave some seed heads standing through winter if they remain tidy and safe. Avoid aggressive species that spread beyond the intended bed, and check whether any chosen plant is invasive in your area.
Arrange plants by mature size and spacing
Read the nursery label for mature width, then space plants so they can fill in without crowding. A compact sedge might be planted about 12 to 18 inches apart, while a large perennial may need 18 to 30 inches or more. These are planning ranges, not fixed rules; variety and growing conditions affect final size. Repeating small groups of three or five of the same species creates a natural rhythm and makes the garden easier to read than a scattered collection of single plants.
At planting, a young garden can look sparse. Resist filling every gap with extra plants too close together. Overcrowding restricts airflow, makes weeding difficult, and can lead to weak growth. Instead, use a thin layer of shredded leaf mulch between young plants and let them mature. Avoid piling mulch against plant crowns. If you sow seed, confirm that the species can establish from seed under your conditions; some natives establish more reliably as plugs or small container plants.
- Choose locally native species with documented moisture and light needs.
- Use grasses, sedges, and flowering perennials for varied structure.
- Plan bloom succession and winter seed-head value.
- Space according to mature width, not the size of the nursery pot.
Thoughtful plant selection creates color and habitat while reducing replacement and watering needs once the garden is established. It also makes the basin look intentional rather than like a temporary drainage ditch.
4. Build the Garden Carefully and Protect the Soil
For many home gardens, late spring or early fall is a useful planting window because temperatures are moderate and plants can establish without the stress of peak summer heat. The best month depends on your climate and soil conditions. Avoid working saturated soil: digging when it is wet can compact the ground and damage its ability to absorb water. Mark utilities first, then remove turf and excavate to the planned depth. Keep the soil from the basin separate from removed sod and debris so you can assess what material you actually have.
Shape the basin gradually, with stable side slopes and a level floor. Save suitable topsoil for planting, but do not automatically mix in large amounts of sand or compost. Adding sand to clay can create a dense, cement-like mixture, and too much organic matter may settle as it decomposes. If the soil drains poorly, ask a local drainage professional or extension service whether a designed soil blend, underdrain, or alternate site is appropriate. An underdrain changes how the system works and may require permits or an approved outlet.
Install the inlet and overflow before planting
Direct runoff into the basin through a downspout extension, shallow swale, or other stable conveyance. Add a stone apron where water first enters to slow its energy and prevent a small channel from forming. Keep the inlet broad enough to distribute flow rather than concentrating it on a single plant. Complete the overflow next, using a level spillway protected with turf, stone, or another erosion-resistant material suited to the site. Test the route with a hose at a modest flow before planting, and adjust any spots where water escapes over an unintended edge.
Do not use a bare, steep trench as an inlet. Fast-moving water can expose roots and carry mulch downhill. Likewise, do not block a natural drainage route without understanding where the water will go instead. If the garden receives runoff from a heavily used driveway or an area with de-icing salts, discuss treatment and plant tolerance with a local expert before directing it into the bed.
Plant, mulch, and establish
Set plants at the same depth they grew in their containers, firm soil gently around the roots, and water them in. Plant larger structural species first, then fill gaps with smaller perennials and sedges. Apply roughly 2 to 3 inches of shredded hardwood or leaf mulch where appropriate, keeping it away from crowns and leaving the inlet and overflow clear. Some native plantings establish better with a lighter mulch layer; follow local recommendations and the needs of the selected species.
During the first growing season, water during dry spells so roots can establish, even though the garden is designed to receive stormwater. Newly planted natives are not instantly drought-proof. Check after storms for sediment deposits, exposed roots, or uneven ponding. Repair erosion early with added soil or stone protection, not by piling mulch into the inlet. If compost is appropriate for the planting area, use mature material sparingly and select it carefully; learn about making and using finished compost according to RHS Composting Guide.
One frequent construction error is compacting the basin floor with heavy equipment or repeated foot traffic. Compaction reduces infiltration and can leave a garden holding water too long. Work from the outside where possible, use hand tools for final shaping, and keep machinery off the finished basin. If the garden has already been compacted, seek local guidance before attempting to loosen it; deep tilling can damage structure, roots, or buried utilities.
5. Maintain the Garden and Make It Wildlife-Friendly
A rain garden is low-maintenance, not no-maintenance. During the first year, inspect it after significant storms and during dry weather. Confirm that the inlet stays open, water spreads across the basin, and the overflow remains stable. Remove leaves or trash that block flow, and pull weeds before they set seed. Hand-weeding is often easiest while native plants are small and the soil is moist but not saturated. Identify volunteer seedlings before removing them; desirable native plants can emerge where they were not originally placed.
Most properly functioning basins drain within a few days, but the acceptable time depends on local design requirements and soil. If water remains much longer than expected, first check for a blocked inlet, a settled basin, compacted soil, or a high sediment layer. Do not immediately deepen the garden or add a drain. Changing the basin can redirect water and create a new problem. If the drainage issue persists, consult a local stormwater specialist or extension office to identify the cause.
Seasonal care that supports healthy plants
In spring, cut back dead stems if needed, clear the inlet, and remove invasive weeds while new growth is visible. In summer, water recently planted or drought-stressed specimens and check that mulch has not drifted into the spillway. In autumn, remove excess sediment and leaves from the inlet, but leave healthy seed heads and some leaf litter where they will not block flow. In winter, avoid walking on frozen plants or piling snow that contains salt into the basin. Adjust this routine to your climate and local wildlife guidance.
As plants mature, thin or divide crowded clumps when their growth slows or flowering declines. Many perennials can be divided in spring or fall, but timing varies by species. Replace a plant only after checking whether its position is too wet, too dry, or too shaded. A replacement chosen for the actual microclimate is more likely to thrive than repeating the same failed plant in the same place. Keep a simple garden note with the planting names, bloom times, and any storm-related issues.
Welcome wildlife without creating hazards
Native flowers can provide nectar and pollen, while grasses and seed heads offer shelter and food. Include several species with overlapping bloom times rather than relying on one showy plant. Avoid routine pesticide use, especially on flowering plants visited by bees and butterflies. A small, shallow stone area can offer a safe place for insects to drink, but do not create standing water that remains for long periods. The basin should drain as intended; a rain garden is not a permanent pond or a substitute for managing mosquito breeding sites elsewhere.
For birds and beneficial insects, retain some stems through winter and avoid tidying every leaf from the whole garden. At the same time, keep the inlet, spillway, and any sight lines clear. A defined edge, mown border, or simple path makes a naturalistic planting look cared for and helps household members recognize its purpose. This balance of habitat and visible maintenance can make a backyard flood prevention garden both useful and welcoming.
- Inspect water flow after major rain and clear blockages promptly.
- Remove invasive weeds before they spread or set seed.
- Water new plants during dry establishment periods.
- Keep pesticides, excess mulch, and sediment out of the flow path.
- Replace struggling plants with species better matched to their zone.
Keep expectations realistic: a garden can slow and absorb some runoff, but exceptionally heavy rain may exceed its capacity. Maintain a safe overflow route and address roof drainage, grading, and other sources of flooding as a whole-yard system.
Frequently Asked Questions
How deep should a rain garden be?
Many residential basins use a shallow ponding depth, often around 6 to 8 inches, but the correct depth depends on local standards, slope, and soil infiltration. Aim for a broad, shallow depression with a level bottom and a stable overflow. Avoid digging deeper simply to hold more water; a basin that drains too slowly can harm plants and cause maintenance concerns.
How long should water remain in a rain garden?
Water is meant to soak in rather than remain permanently. Many designs are expected to drain within roughly 24 to 48 hours, though local rules and site conditions may differ. If ponding lasts longer, check for blocked inlets, compacted soil, sediment buildup, or an unsuitable location, and seek local technical advice before changing the basin.
Can I build a rain garden in clay soil?
Possibly, but test the soil first. Dense clay may infiltrate too slowly for a conventional basin, while mixing in sand without a tested recipe can make the soil harder and less workable. Consider another site, a smaller design, or a professionally specified soil system. Follow local stormwater guidance before directing substantial runoff into clay soil.
What plants should go in a native plant rain garden?
Choose species native to your region and match them to the wet, middle, and dry zones of the basin. Use local nursery, botanical garden, or extension recommendations instead of copying a planting list from a different climate. Combine grasses or sedges with flowering plants that bloom at different times, and check mature size before deciding spacing.
Will a rain garden stop my yard from flooding?
A rain garden can capture and infiltrate some runoff when it is correctly sized and located, but it cannot guarantee flood prevention during extreme storms or solve every drainage problem. Keep a safe overflow path, check how water moves across the entire property, and consult a drainage professional if water threatens a foundation, basement, or neighboring land.
Make Your Rain Garden Part of a Healthier Yard
A successful rain garden begins with careful observation, a safe overflow plan, and plants suited to local soil and climate. Build the basin for realistic runoff, protect it from compaction and erosion, and give new plants time to establish. The result can be a colorful habitat that makes better use of stormwater while adding structure and seasonal interest to the yard. For more practical garden inspiration and planning ideas, visit Blossom Gardens Hub and start shaping a landscape that works with nature.
